As an Amazon Affiliate, I earn from qualifying purchases at no extra cost to you.
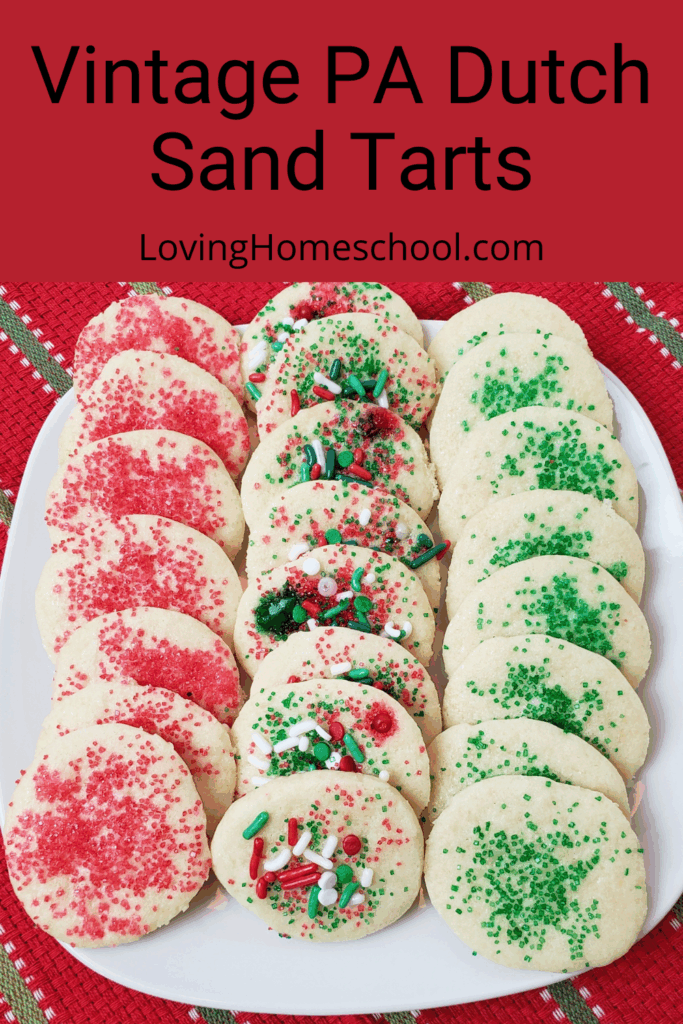
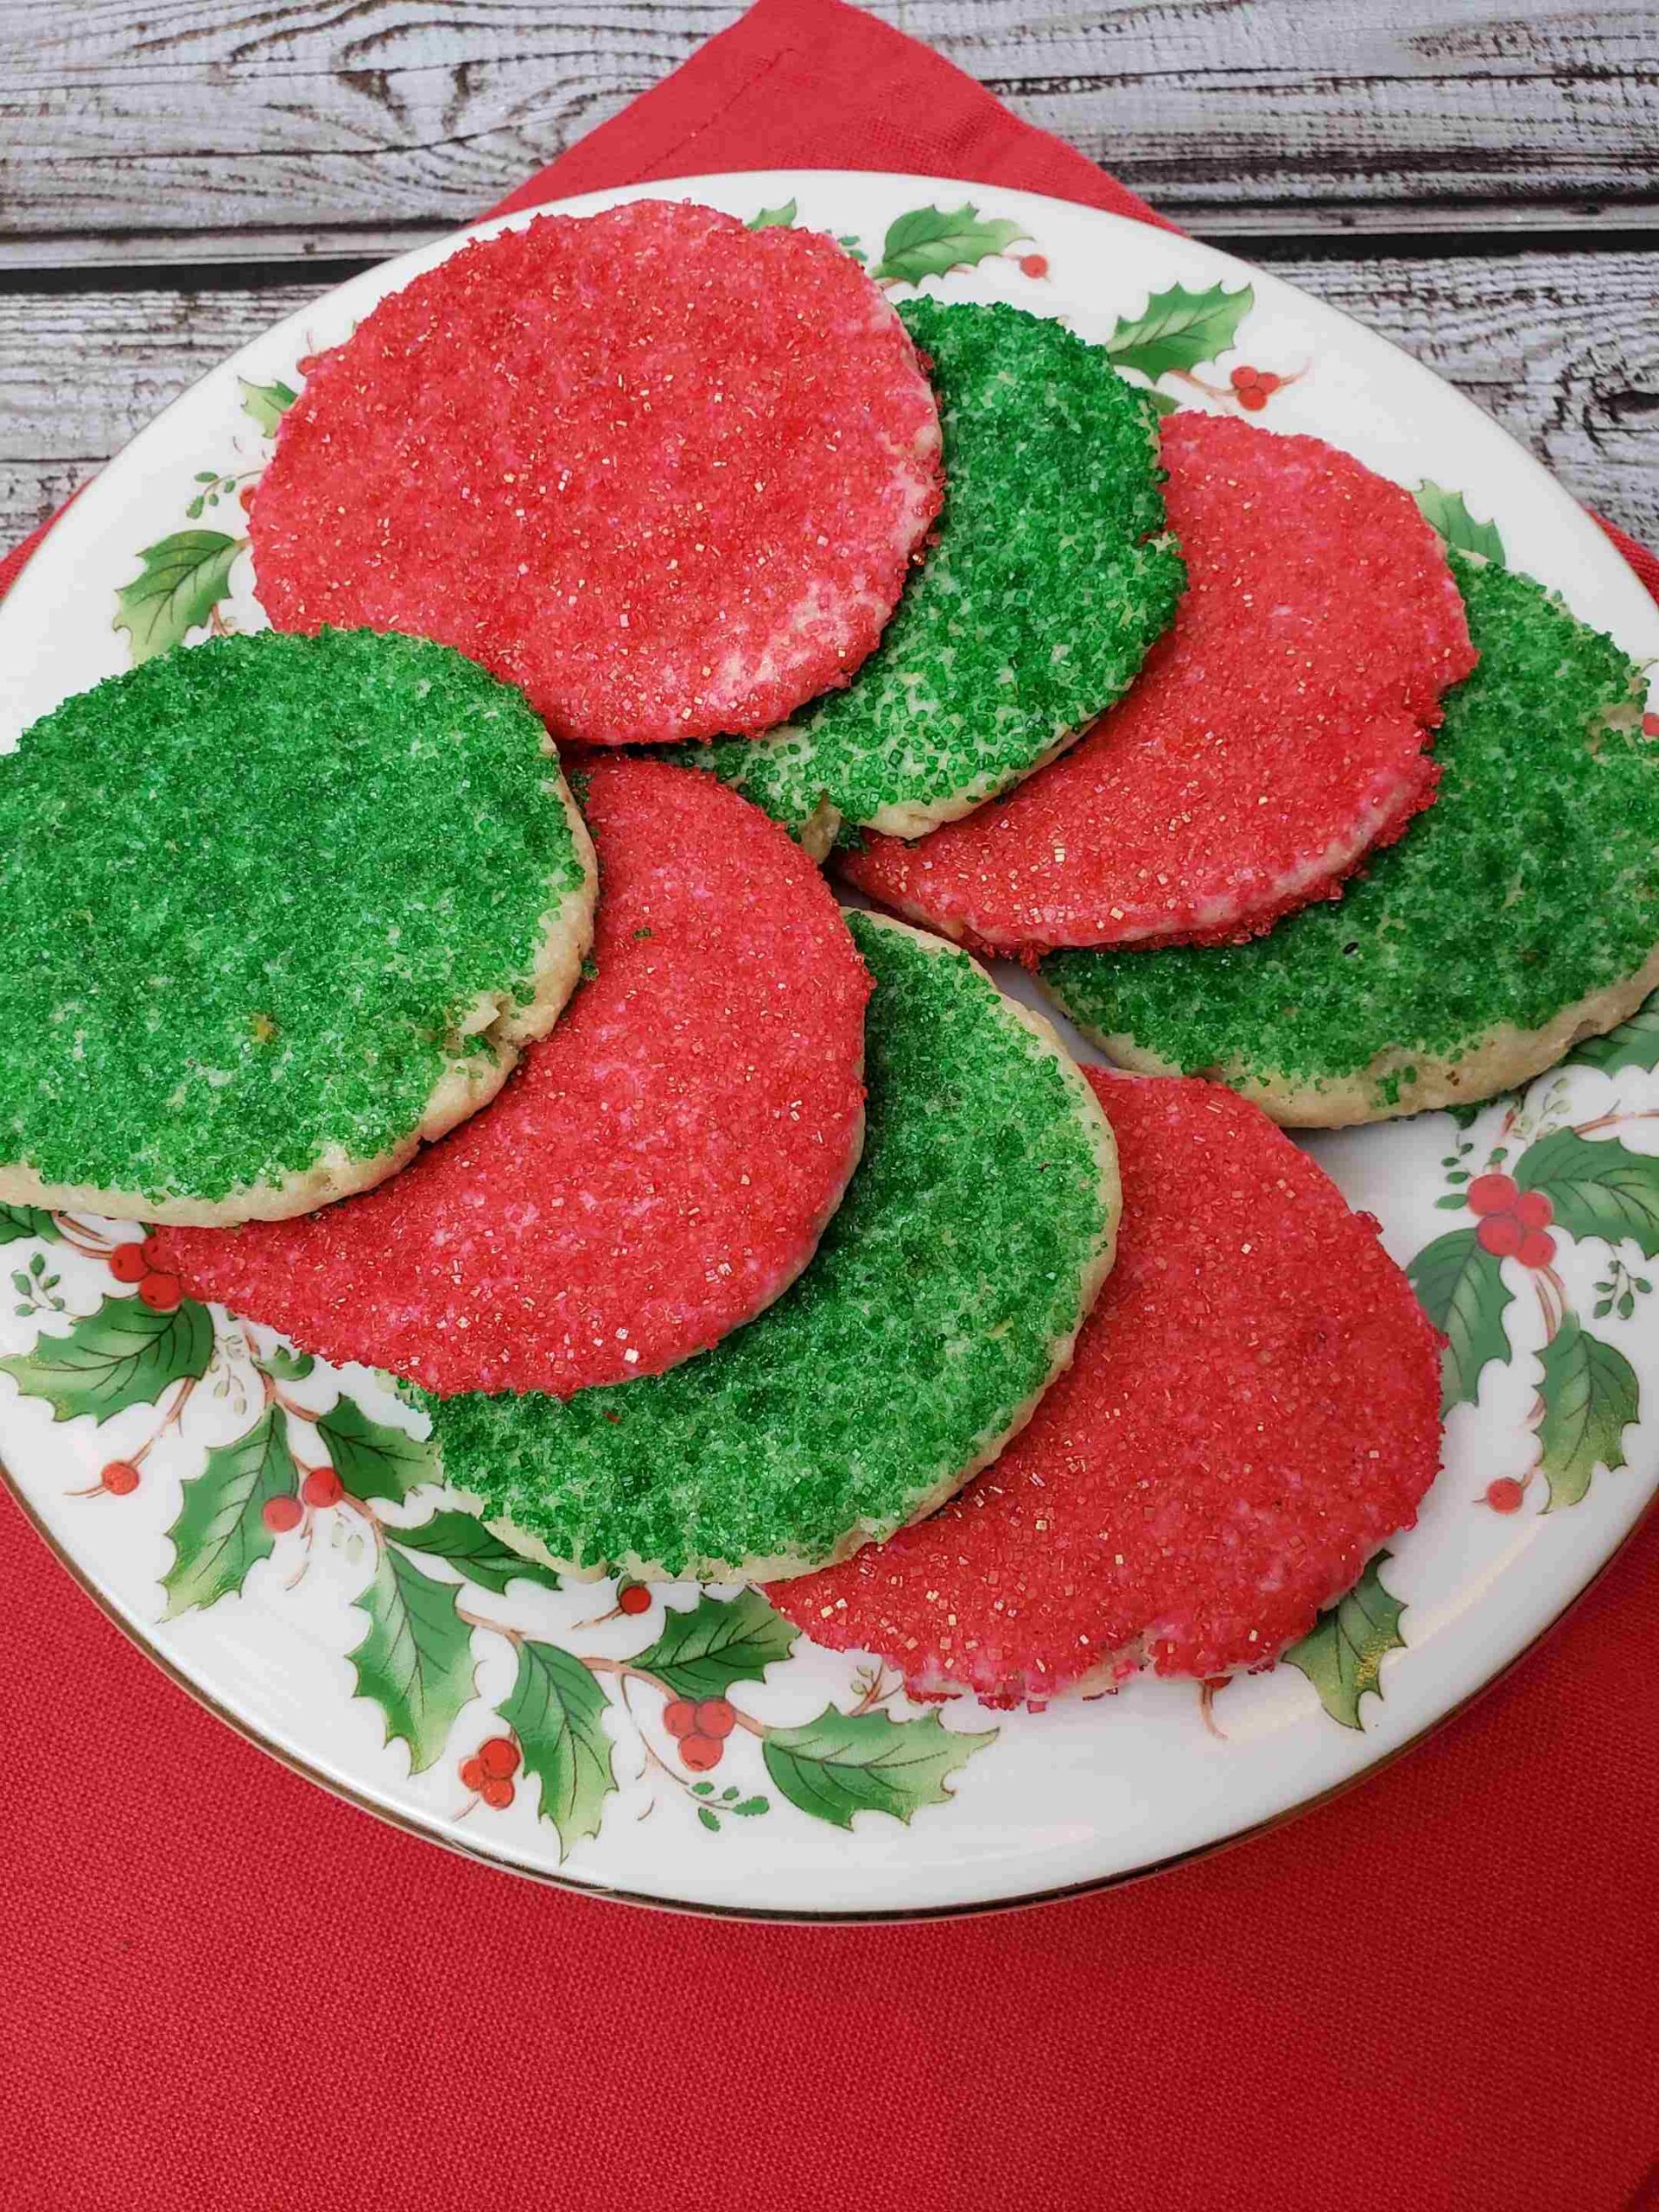
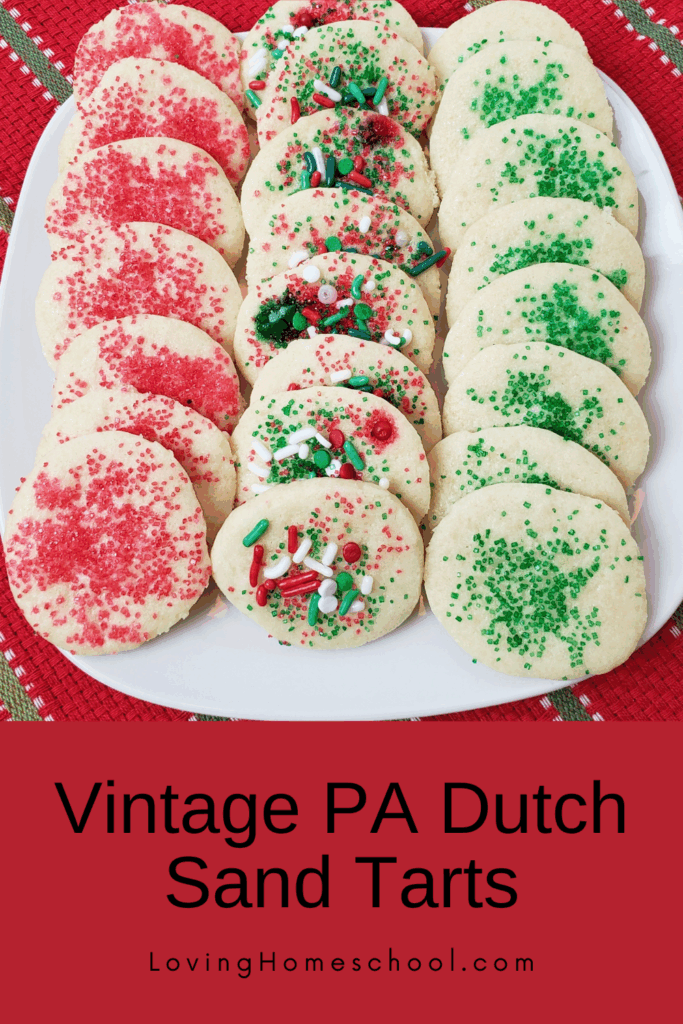
This Vintage PA Dutch Sand Tarts recipe is handed down from Great Grandma. They are the perfect addition to the Christmas cookie tray or any occasion!
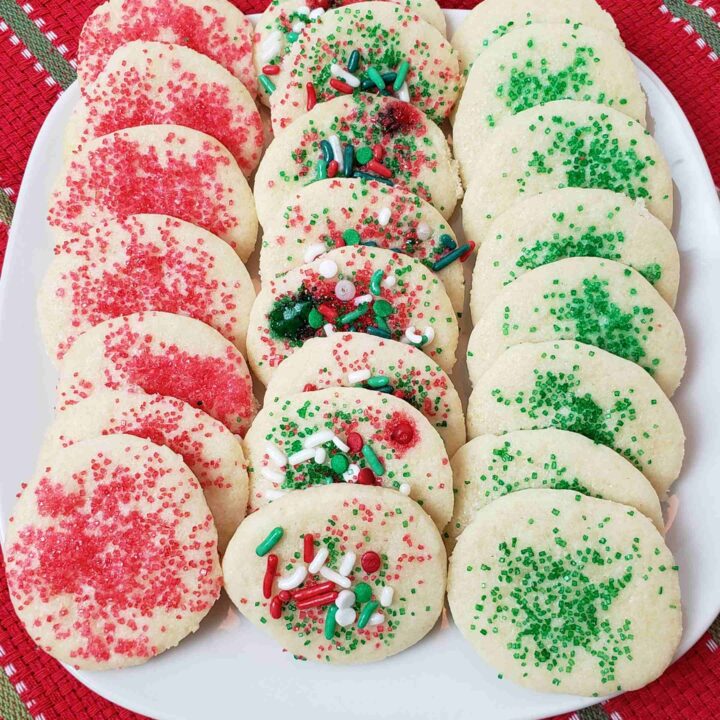
These Vintage PA Dutch Sand Tarts are a thin, pretty, crunchy cookie. They get their name because of their crumbly, sandy texture.
I have seen some sand tart recipes online that are rolled out with a rolling pin but this recipe handed down from my husband’s grandmother is a chill, slice and bake process.
We will roll the dough into logs, chill it, slice the cookies as thin as possible, decorate, then bake.
This recipe has been shared in Weekend Potluck. Head on over to these great sites for LOTS of new recipes each week!
Other PA Dutch Recipes
Other Cookie Posts
Triple Chocolate Truffle Cookies
Easy St. Patrick’s Day Cookies
When is National Cookie Day?
December 4th is National Cookie Day! Be sure to have some cookies on this special day to celebrate them!
Why I Love This Recipe
They are beautiful on a Christmas cookie tray.
Kids love to help make them.
They are great in lunchboxes.
They are great with a cup of coffee.
They store well so can be made up ahead of time.
With different toppings, they can be made for multiple occasions or any regular day.
Can These Be Frozen
Yes, both the prepared dough and the baked cookies can be frozen! Wrap well and freeze for up to 6 months.
How to Store the Cookies
Store in airtight container on counter or in refrigerator.
Key Ingredients
(Full printable ingredients and instructions are just below.)

Butter-margarine is fine too but butter really does taste better
White sugar
Eggs-large eggs
Vanilla extract
How to make Vintage PA Dutch Sand Tarts
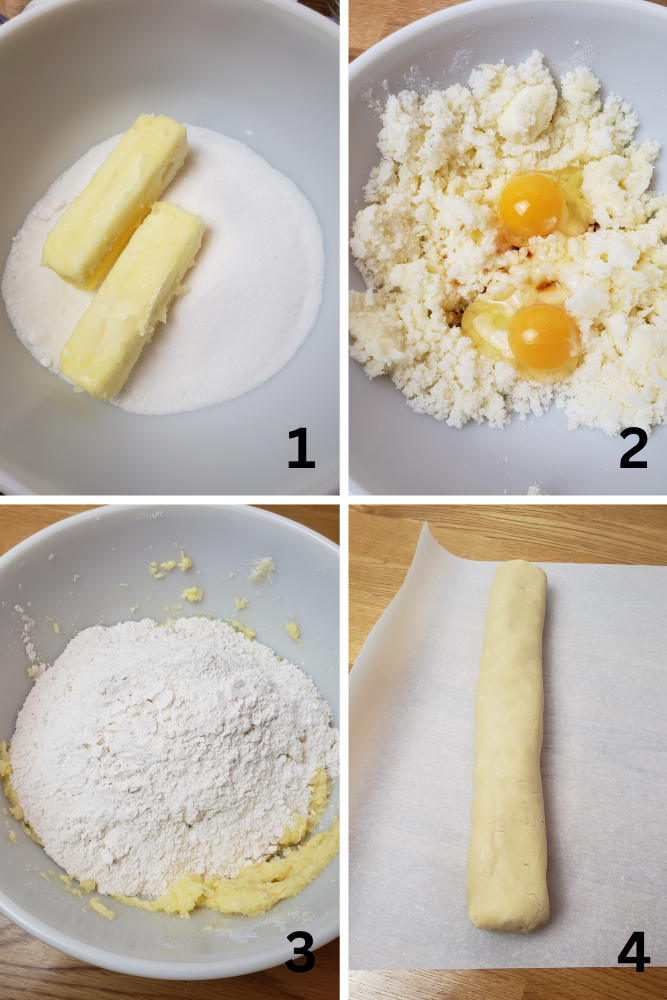
1-Cream butter and sugar together.
2-Add eggs and vanilla.
Beat well.
3-Add flour and salt to butter mixture.
Beat well.
4-Shape into thin rolls and wrap in waxed or parchment paper.
Chill in the refrigerator overnight.
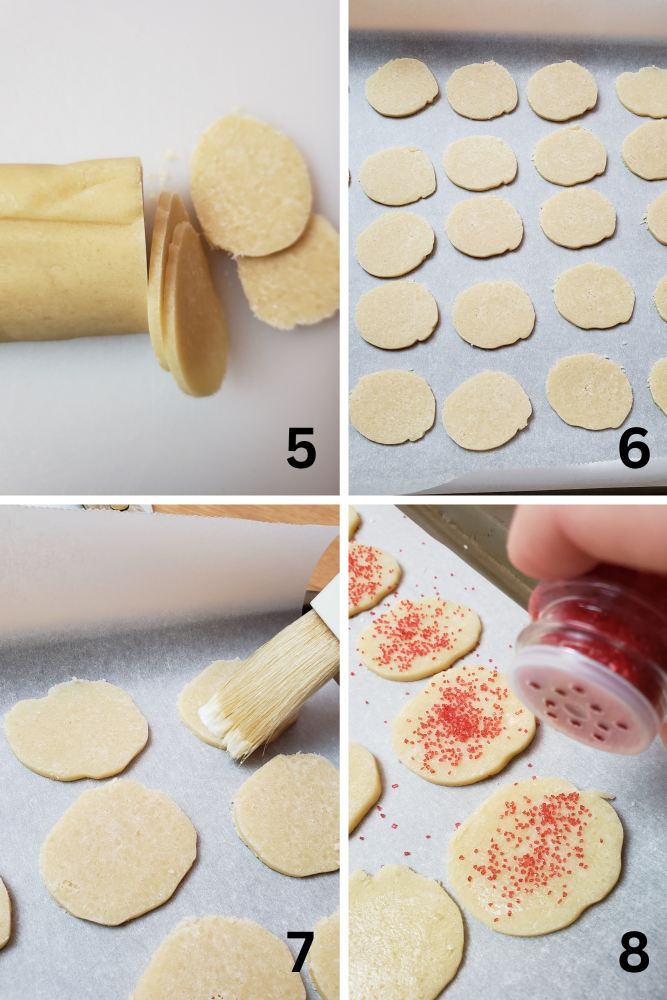
5-Cut into slices as thin as possible.
6-Place about 1 inch apart on parchment paper lined cookie sheet.
7-Brush tops of cookies with milk or egg.
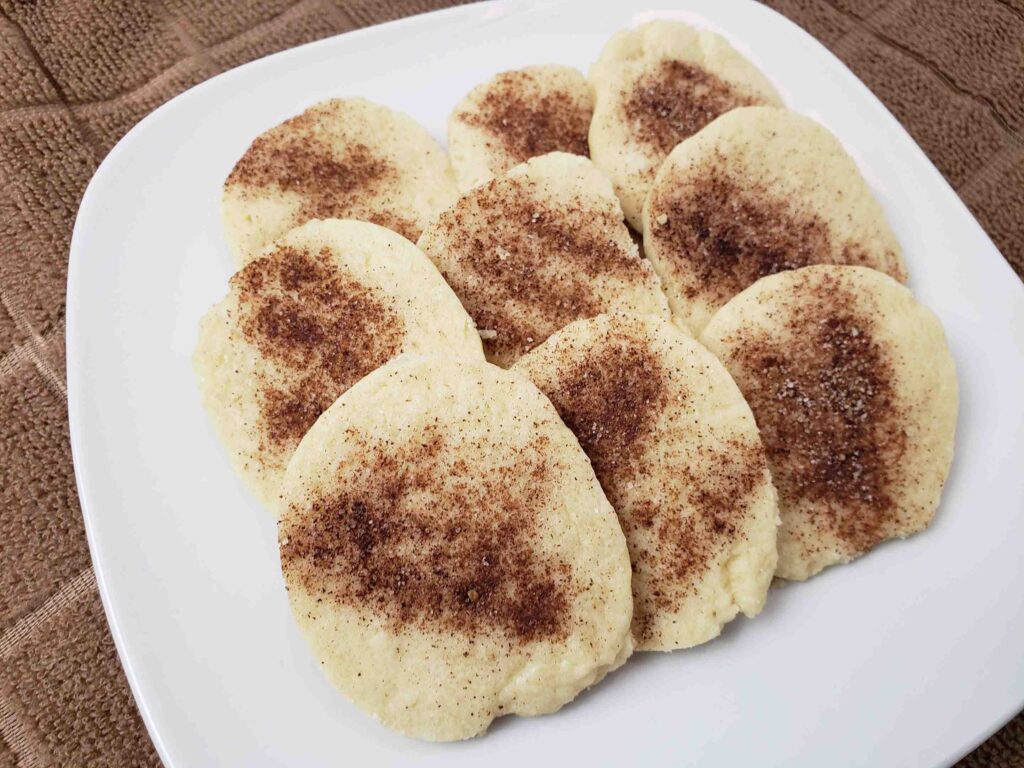
8-Sprinkle with decorations, plain sugar or cinnamon and sugar.
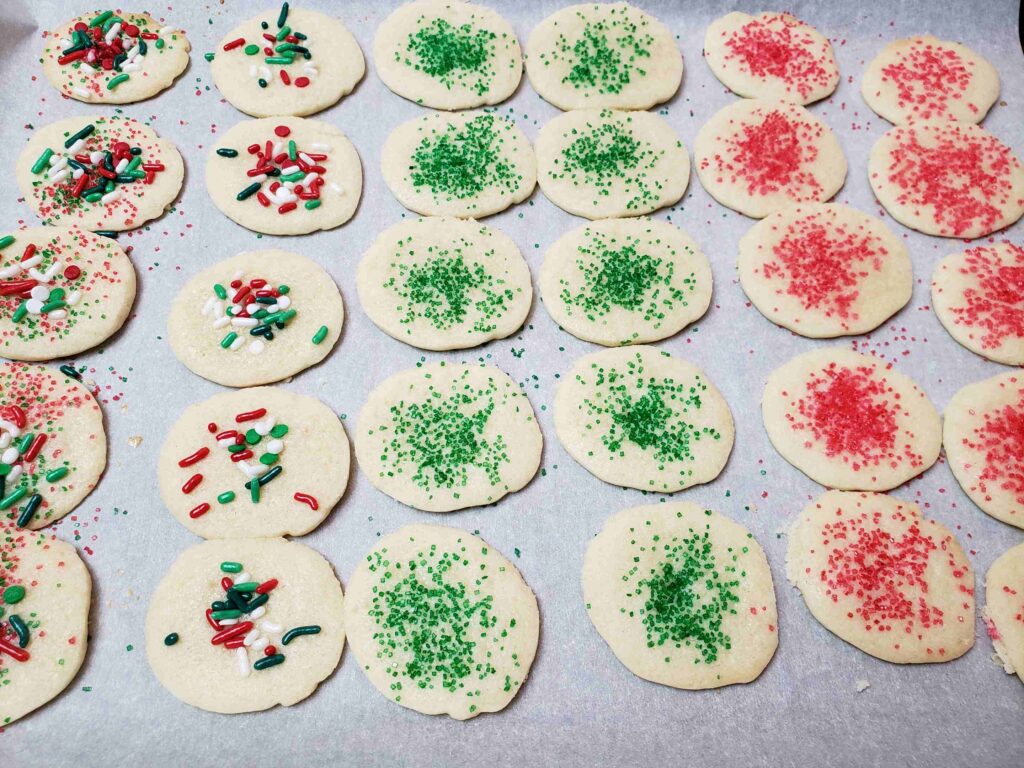
Or cinnamon sugar combo for anytime!
Bake in preheated 350*oven for 7-9 minutes.
Don’t forget to pin for later!
THANK YOU so much for visiting our website. If you try this recipe, or any other recipe on Loving Homeschool, please take a moment to rate the recipe and/or leave a comment. I love hearing from you, but it also helps the other readers who are thinking of making the recipe.
Are you following me on Pinterest? I have been working very hard making new boards I think you will love and am adding dozens of new pins from all of the popular homeschooling websites!
Come join us on our Facebook page, Loving Homeschool. I am adding daily pictures, links and much more than I would on the blogs and it is a place for you to find support from others on the same journey as you are. Come and share with others, ask questions and learn! And if you love recipes, follow my Best Recipes You Will Want To Make group on Facebook! Feel free to share your own favorites and find many new ones there!
I enjoy offering free printables and resources to bless my readers. Your frequent visits to my blog and purchases through affiliate links and ads keep the lights on so to speak. Thank you!
Vintage PA Dutch Sand Tarts
This Vintage PA Dutch Sand Tarts recipe is handed down from Great Grandma. They are the perfect addition to the Christmas cookie tray or any occasion!
Ingredients
- 1 cup butter
- 2 cups white sugar
- 2 large eggs
- 3 ½ - 4 cups flour
- 1 teaspoon vanilla extract
- 1 teaspoon salt
- Optional sprinkles, colored sugar or brown sugar and cinnamon
Instructions
Cream butter and sugar together.
Add eggs and vanilla.
Beat well.
Add flour and salt to butter mixture.
Beat well.
Shape into thin rolls and wrap in waxed or parchment paper.
Chill in the refrigerator overnight.
Cut into slices as thin as possible.
Place about 1 inch apart on parchment paper lined cookie sheet.
Brush tops of cookies with milk or egg.
Sprinkle with decorations, plain sugar or cinnamon and sugar.
Bake in preheated 350*oven for 7-9 minutes.
Notes
Dough can also be wrapped tightly in parchment paper and plastic wrap and frozen for up to 6 months.
Nutrition Information
Yield 60 Serving Size 1Amount Per Serving Calories 88Total Fat 4gSaturated Fat 2gUnsaturated Fat 1gCholesterol 15mgSodium 65mgCarbohydrates 13gFiber 0gSugar 8gProtein 1g
This data was provided and calculated by Nutritionix using unknown brands unless named in the recipe. If nutrition is important to you, I highly encourage you to verify any data you see here with your favorite nutrition calculator. Also, you can put in exactly what you used so it is the most accurate. This is just to give you an idea, as any nutrition calculation is not exactly accurate unless every single product brand used is entered. Please note also that I am not a certified nutritionist or health professional of any kind. Please consult a doctor or trained professional for medical advice.

Cindy
Welcome! I am a wife, mother, mother-in-law, Grammy, daughter, sister and retired homeschooler. I enjoy writing about things I have learned over the years, sharing recipes and tips with others and making free printables for parents and teachers.